Device Configuration - Linksys PAP2T
PREREQUISITE
We assume that you have configured the "Router" settings accordingly
You have created a peer to use for this device.
Creating a Peer for Softphones
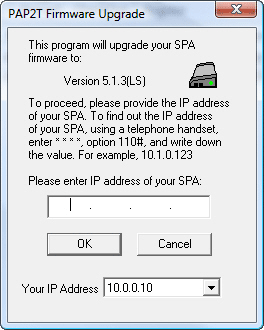
STEP 1 - Apply a "Factory Reset"
Plug an analog phone in "Line 1"
Dial "****" and wait for instructions.
Once you are asked to input an option, enter "73738" or "RESET" followed by the "#" sign
STEP 2 - Update the firmware
Go to the manufacturer website and head to the "Download" section - Linksys -
http://www.linksys.com
Select your PAP2T version in the drop-down menu
Click on the "Downloads for this product" button to continue
Download the firmware and extract the zip file to your desktop.
Double-click on the executable file and follow the update instructions
STEP 3 - "SIP tab"Configuration
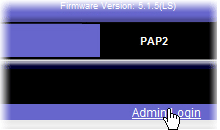
Click the "Admin Login"link
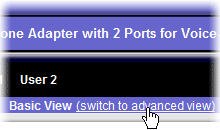
Click the "switch to advanced view" link
Click the "SIP" tab
Make sure the value RTP Packet Size is 0.020. Anything else could cause sound distortion
STEP 4 - Line 1 Configuration
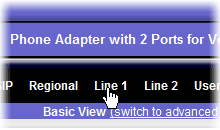
Click the "Line 1" tab.
Select "yes" for the "NAT Mapping Enable" option
Select "yes" for the "NAT Keep Alive Enable" option
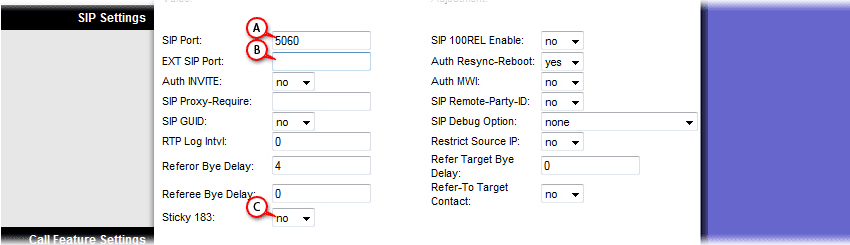
STEP 5 - Ports Selection
Chose an unused port from range 5060 to 5099 for the "SIP Port" texfield
Enter the same value as "SIP Port" for the "EXT SIP Port" textfield
Select "yes" for the "Sticky 183" option
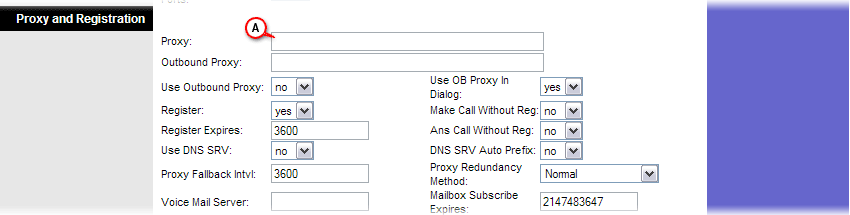
STEP 6 - Proxy Server Configuration
Type in the
SIP Proxy Addres
previously selected in STEP 3.D of "
Creating a Peer for Softphones
" guide
STEP 7 - Proxy Server Login
Type in your SIP peer
username
previously typed in STEP 3.B of "
Creating a Peer for Softphones
" guide
Type in your SIP peer
password
previously typed in STEP 3.E of "
Creating a Peer for Softphones
" guide
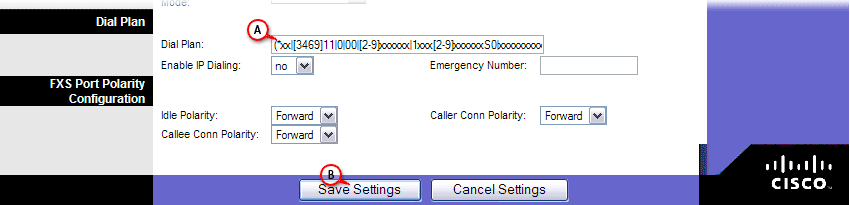
STEP 8 - "Dial Plan" Customization
Type in the recommended dialplan in the "Dial Plan" texfield
Recommended Dial Plan:
(*xx|[3-9]11|0|00|[1-9]xxx|[2-9]xx[2-9]xxxxxxS0|1xxx[2-9]xxxxxxS0|xxxxxxxxxxxx.)
Click the "Save Settings" button
STEP 9
Reapeat steps 4 through 9 for "Line 2" if needed. You will need to create another peer for that.
Enjoy !